
In today’s world, where we increasingly move our activities to the digital realm, the ability to scan documents using a phone becomes extremely useful. Whether you need to send an important document to work or simply want to keep a digital copy for yourself, scanning with a phone is quick and easy. Below you will find a comprehensive guide on how to effectively scan a document on an Android and iOS phone.
Why is Scanning with a Phone So Convenient?
Scanning documents with a phone is convenient for several reasons. First, it avoids the need for a dedicated scanner, which takes up a lot of space and often requires connection to a computer. Second, most modern smartphones are equipped with sufficiently good cameras that can provide clear document scans. Finally, thanks to scanning apps, we can easily store, edit, and share scanned documents, making life easier in everyday situations.
Scanning a Document on Android
Choosing the Right App
On Android, you have many document scanning apps to choose from. Here are some popular options:
- Google Drive: A free app that has a built-in document scanning feature.
- CamScanner: An app offering a wide range of editing features and the ability to save documents in various formats.
- Adobe Scan: An app from Adobe, known for its automatic text recognition (OCR) feature, which allows editing of scanned text.
How to Scan a Document?
- Install the App:
- Open Google Play Store.
- Type the app name, e.g., “Google Drive,” and click Install.
Open the App:
- Launch the installed app (e.g., Google Drive).
- Select the document scanning option.
Scan the Document:
- Position the phone over the document, make sure it is well-lit, and click the shutter.
- The app will automatically adjust the frame and improve the scan quality. You can manually adjust the image if necessary.
Save and Share:
- After scanning the document, the app will suggest saving it in the chosen format (e.g., PDF).
- You can also share the scan via email or upload it to the cloud.
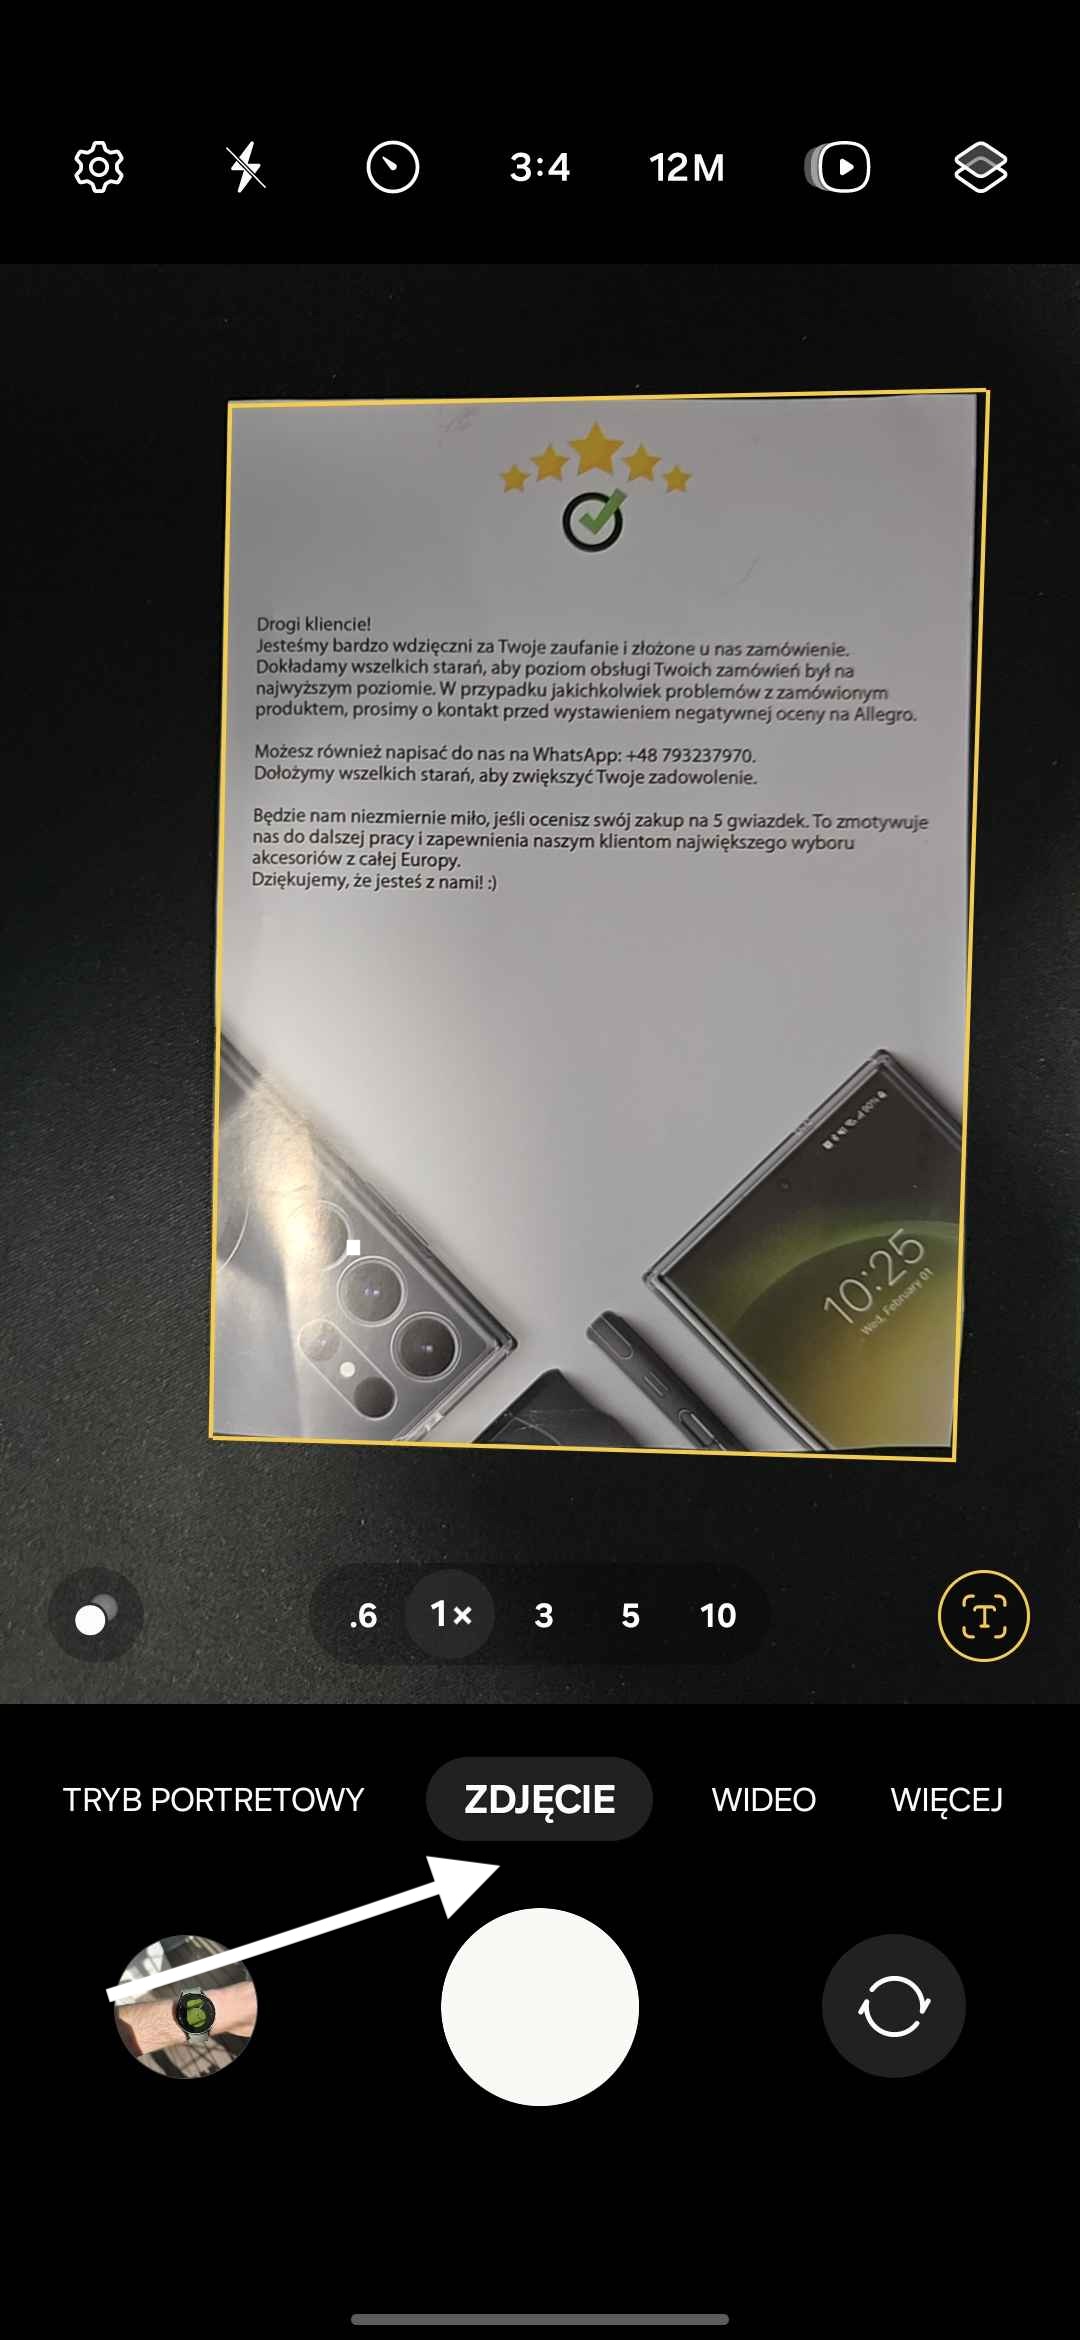
It is worth noting that on different Android phones, such as Samsung, there may be differences in the user interface. Below you will find an example of scanning a document on a Samsung phone.
In the camera app, you will find several modes and features. To switch to document scanning, select the “Scan” or “Document Scanner” option.
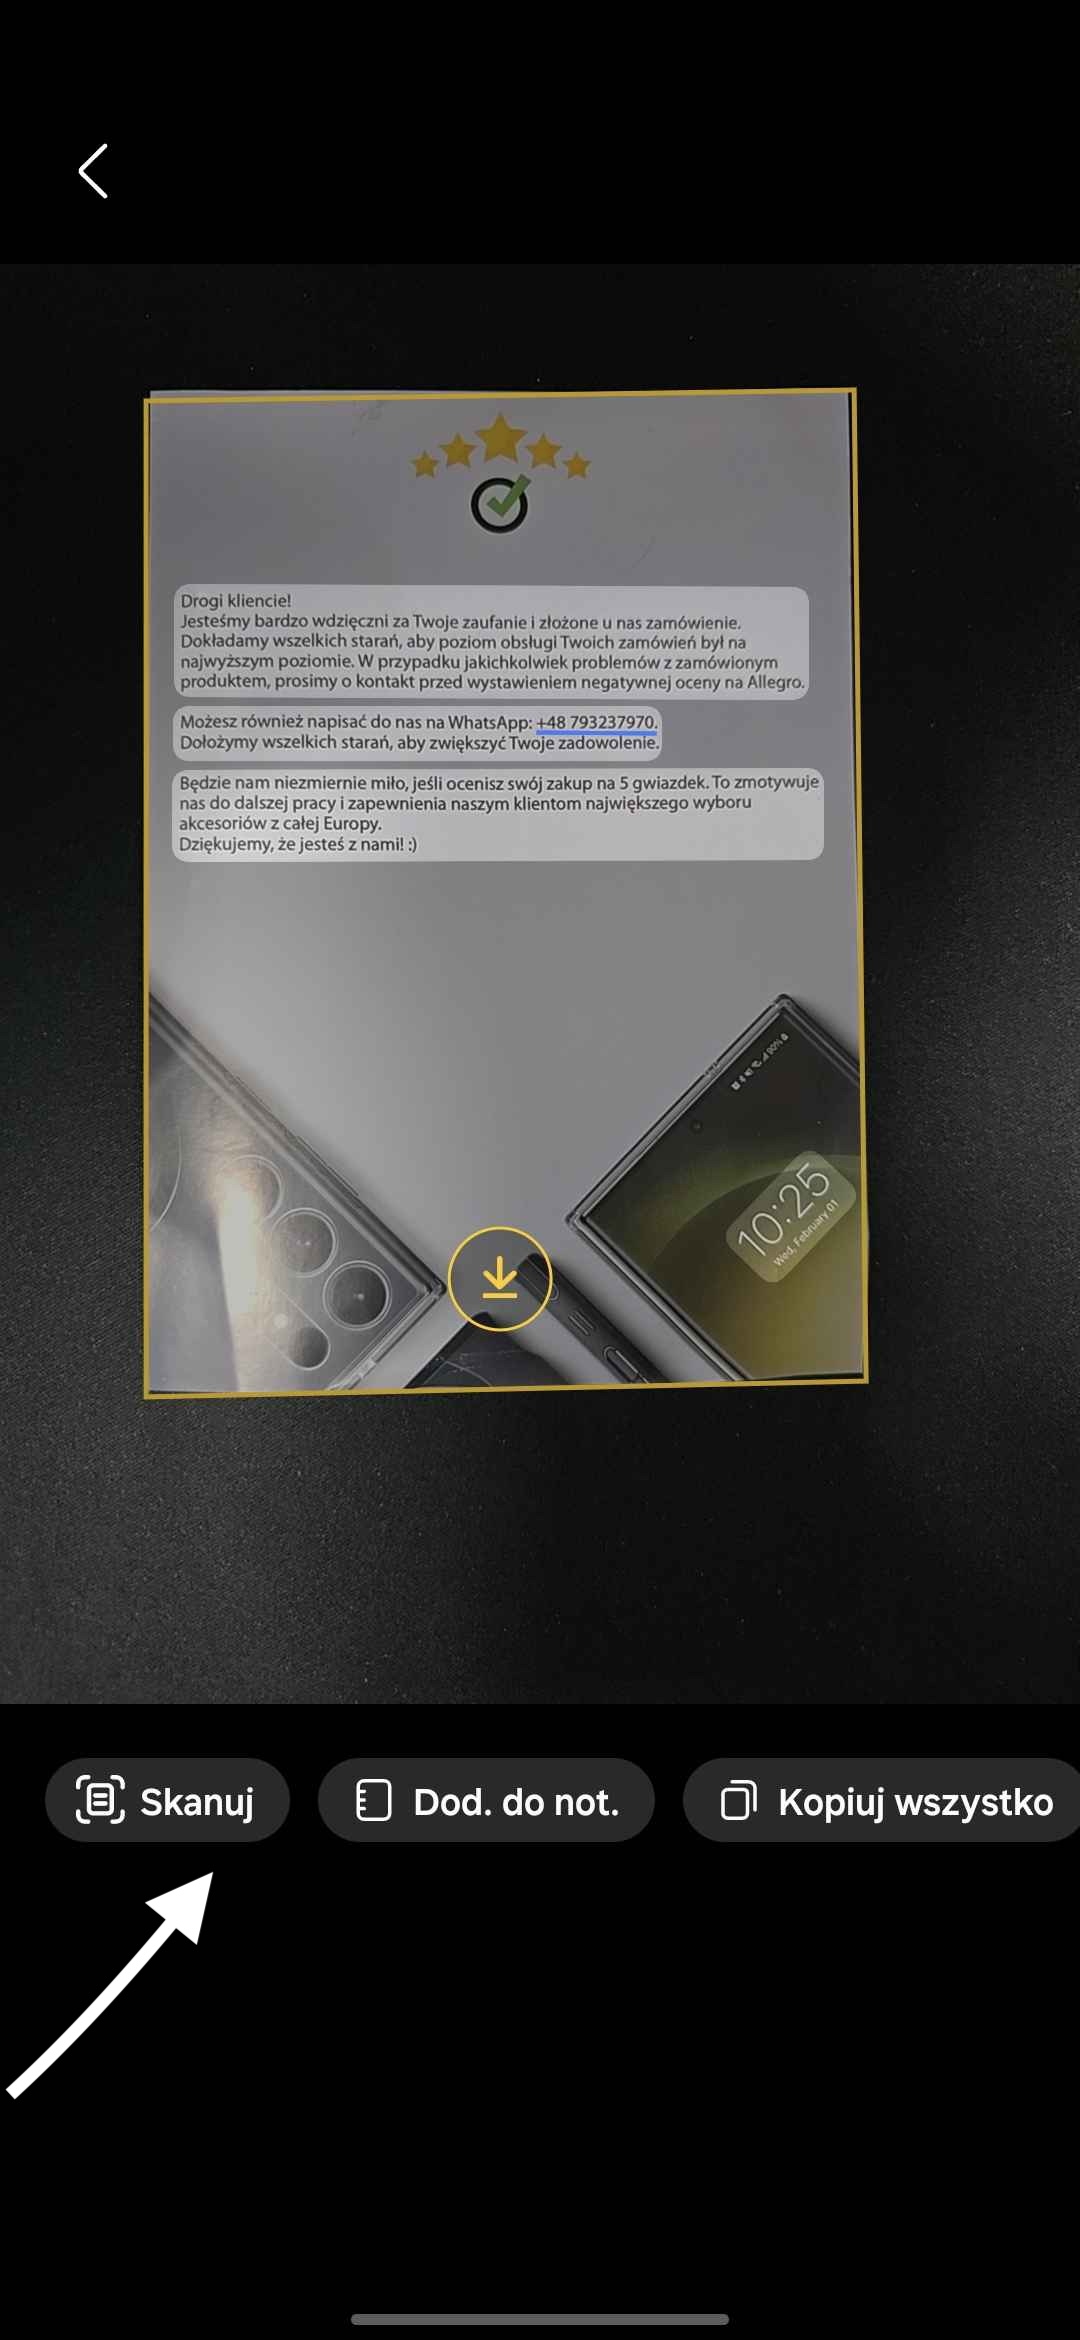
Place the document in the camera frame. The app will automatically adjust the frame and sharpen the image. In some models, the app may automatically detect the document edges and take pictures without the need to manually press the shutter.
After scanning the document, you will have the option to save it in the photo gallery or directly share it using various apps. The app may also offer options to edit or enhance the scan before saving.
Scanning a Document on iPhone
Choosing the App
On iPhone, you will also find several useful apps for scanning documents:
– Notes: Built-in document scanning feature, available without the need to install additional apps.
– Adobe Scan: Allows document scanning and using OCR features.
– Microsoft Office Lens: Ideal for Microsoft Office users, offering many useful features.
How to Scan a Document?
Install the App:
– Open App Store.
– Search for the app name, e.g., “Notes,” and click Download.
Open the App:
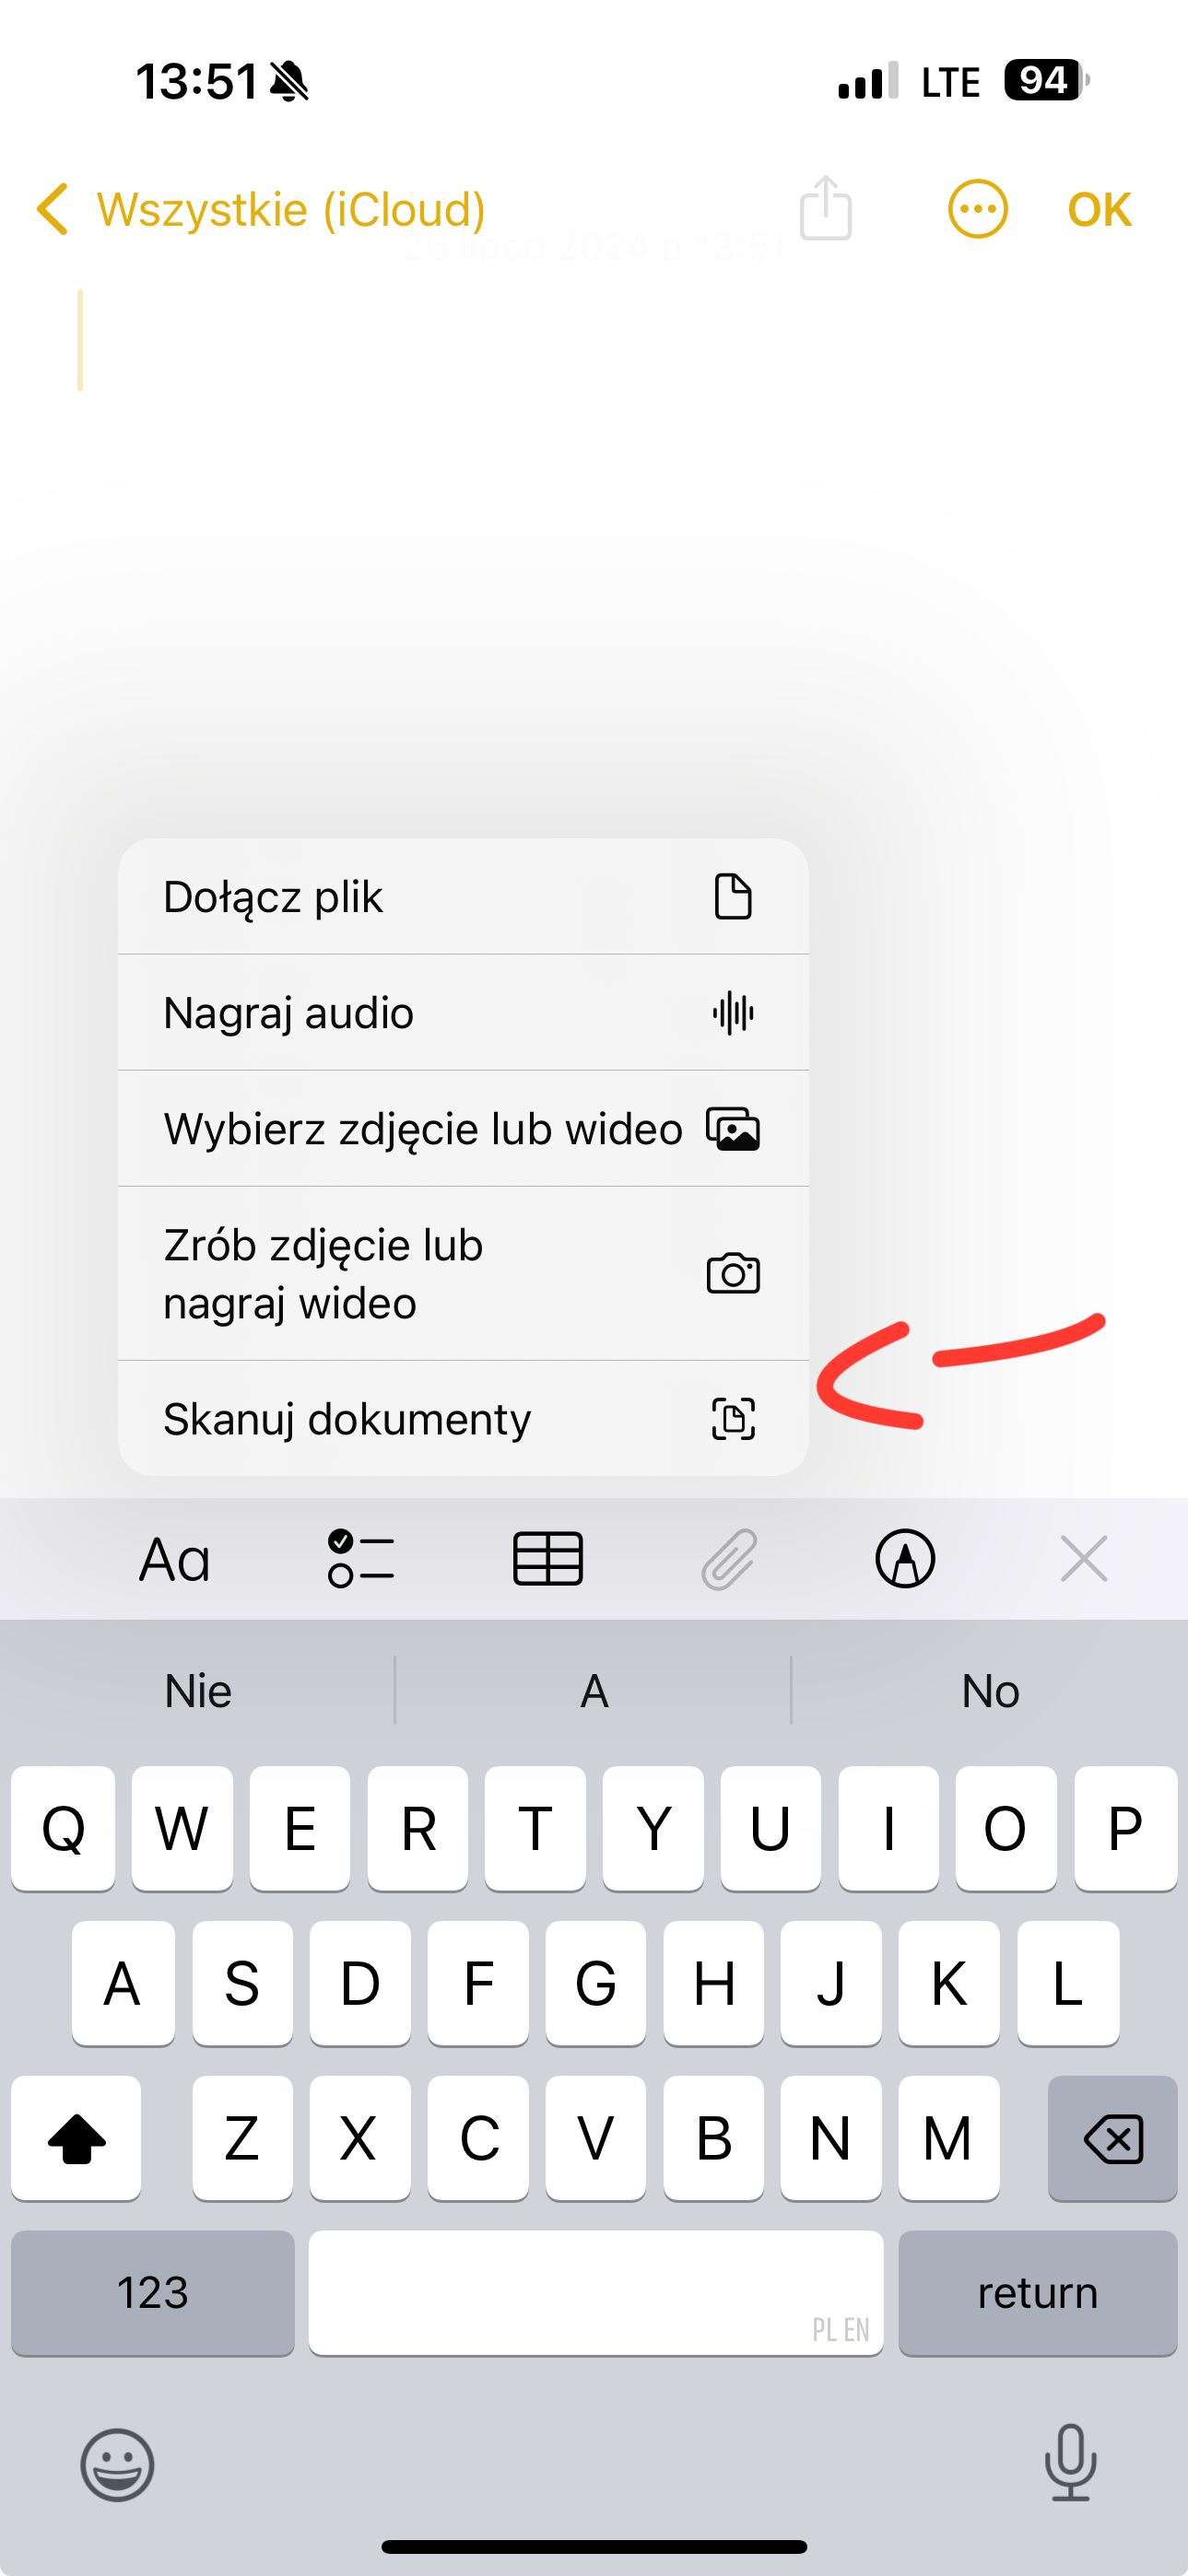
– If using Notes, create a new note and click the + icon, then select “Scan Document.”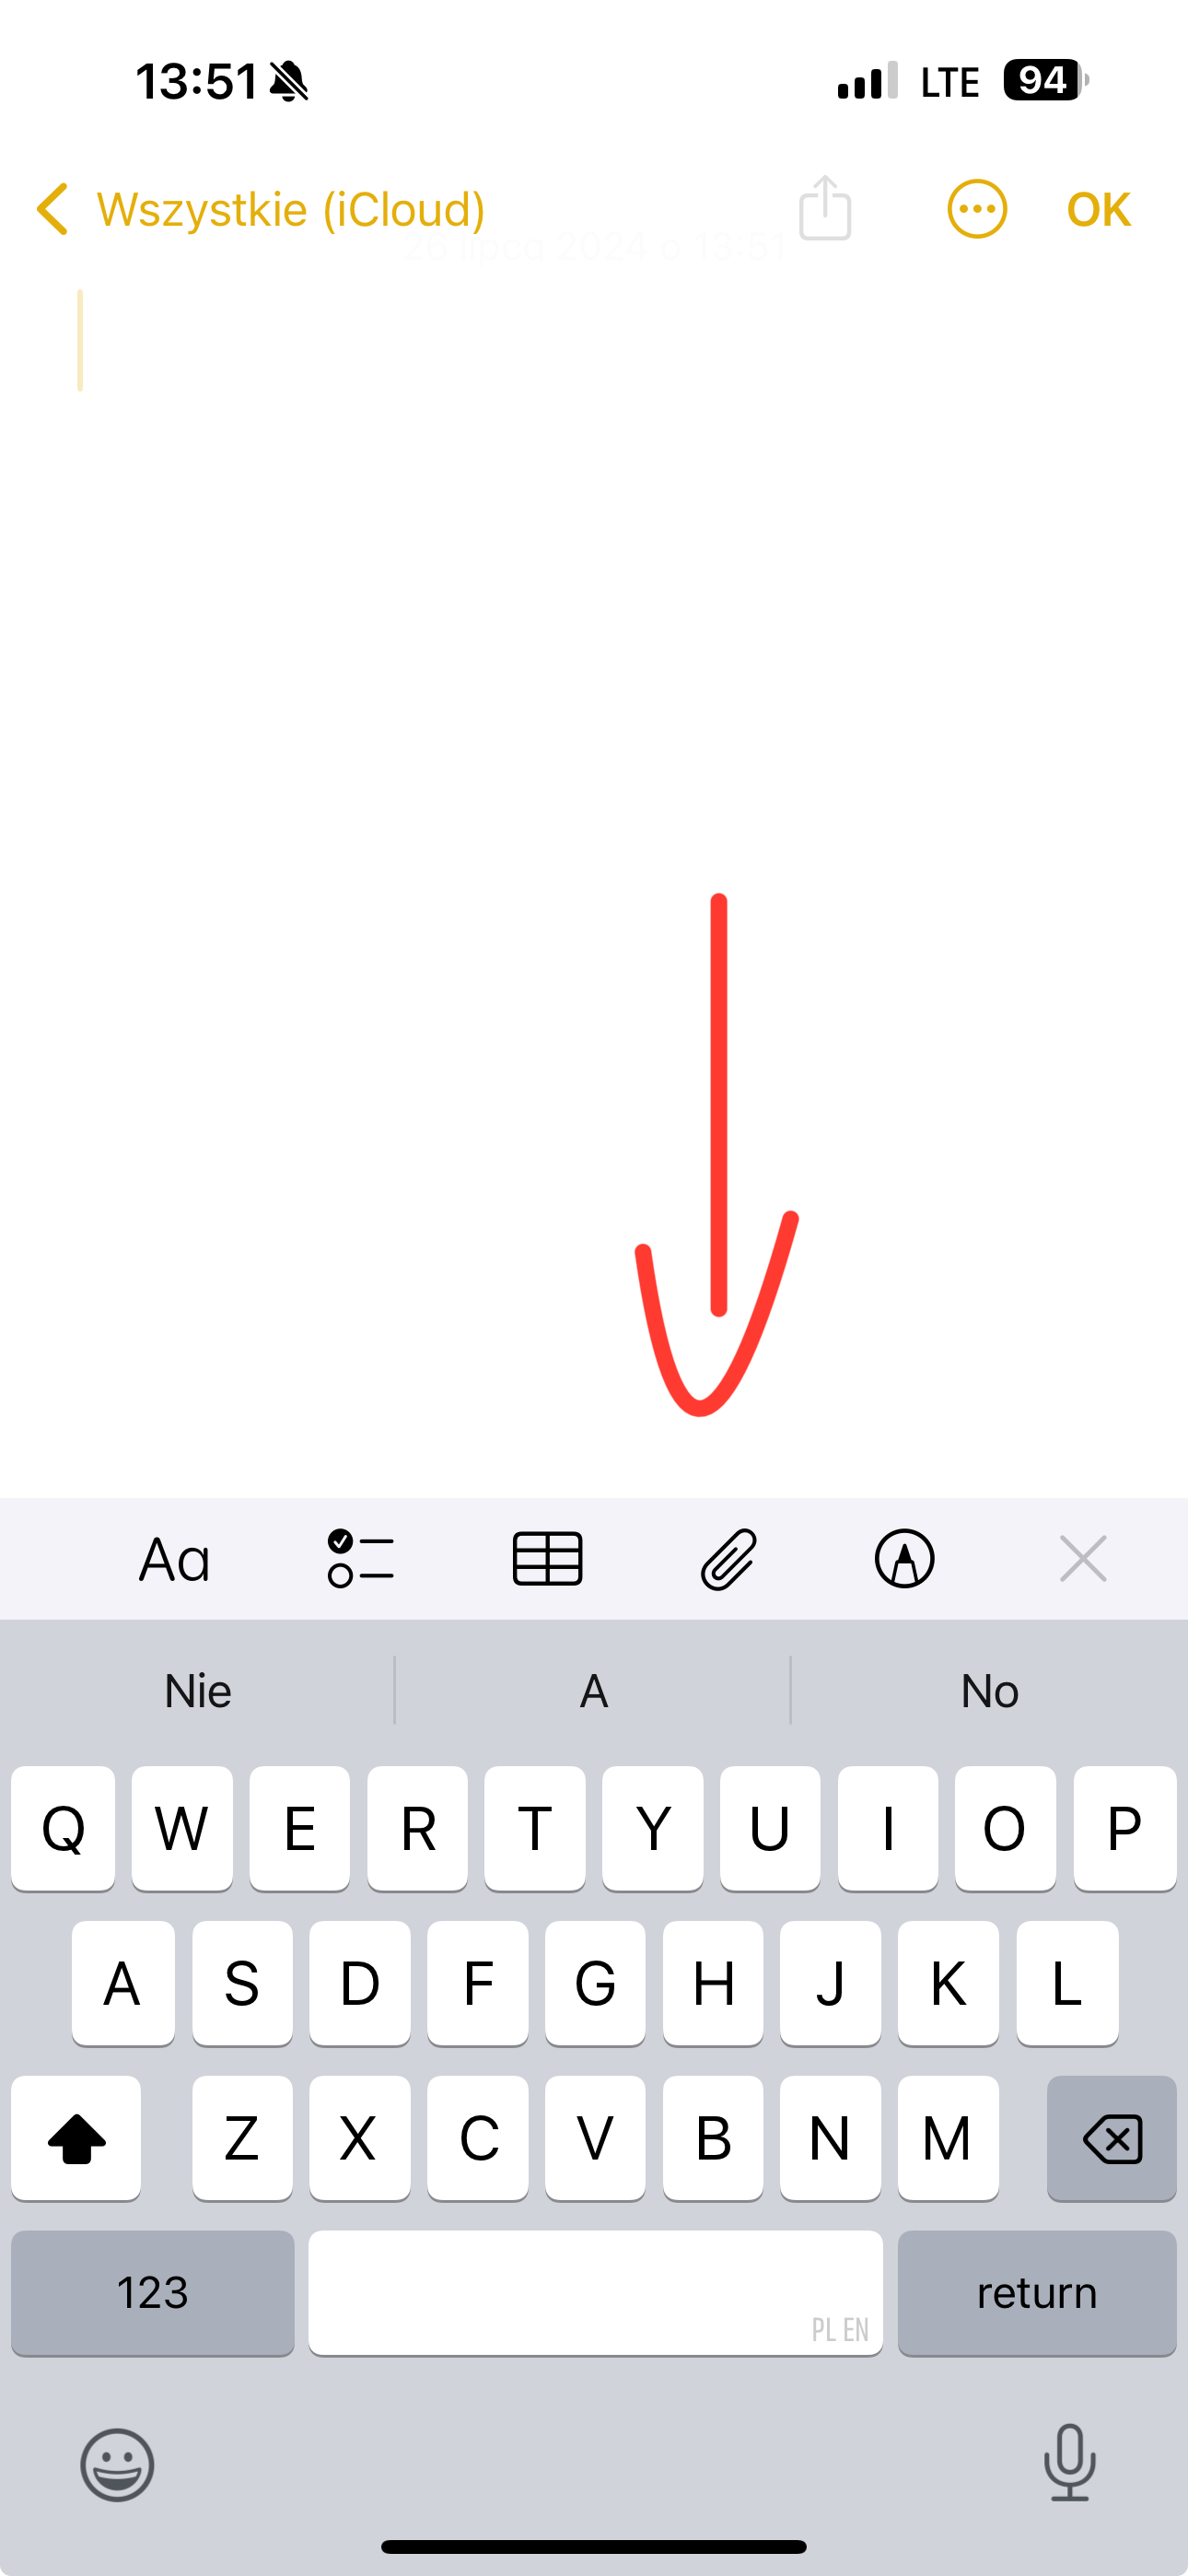
Scan the Document:
– Position the phone over the document. The app will automatically detect the document and take a picture.
– You can adjust the scan, improve its quality, or crop the frame according to your needs.
Save and Share:
– Notes: The document will be saved in the note. You can export it as a PDF or share it.
– Adobe Scan: Save the document in PDF format or send it via email.
Final Tips
Lighting: Try to scan documents in well-lit areas to avoid shadows and reflections.
Stability: Keep the phone steady while scanning to ensure image sharpness.
Check Quality: Always check how the scanned document looks before saving or sharing it.
Scanning documents with a phone is a quick and convenient way to convert paper documents into digital versions. Now that you know the basics, you can confidently use this feature to make your life easier!
Leave a Reply